
Send Template Emails with Net Core Mailkit
By Krystal Ruwoldt
Updated 11/15/2020
While setting up my own website (yes, this one you are visiting right now!) I had a bit of trouble setting up automatic emails for tasks such as email confirmation, password change requests for users and even getting a contact form to send an email to myself. Why was this? Well, I had been using SendGrid (as the Microsoft documentation outlines) but then it seemed during August 2020 many of SendGrid’s IPs had been added to Spamhas.org. Major problem! But indeed I found a solution that so far is working very well and only required using the NETCore.Mailkit extension package. Nice one! Read on to recreate my demo app (easy enough for beginner-level) or jump ahead to sections you are interested in.
Table of Contents
- Minimum Requirements or Setup a New Project
- Add MailKit Options to Startup.cs and Configuration Settings
- Creating a Simple Contact Form - Razor Pages
- Creating a Simple Contact Form - MVC
- Creating Email Templates
- Wiring Up the Contact Form and Testing
- Wiring Up the Identity Scaffolded Pages and Testing
- Further Ideas and Improvements
- Comments
Minimum Requirements or Setup a New Project
If you don't already have an ASP.Net Core web app for this demo, follow these steps to generate a basic project to implement this email solution. Alternatively, the only requirements are that your project be some 'flavour' of a C# ASP.Net Core Web Application, and using Authentication (the Microsoft Identity API). If you don't already have your own domain and SMTP email service with your host, you can use PapercutSMTP (as I have used in this demo) to send emails in debug. Also, I am using Visual Studio Community 2019 as my IDE. You are also welcome to download the source code of this project from my github. Let's begin!
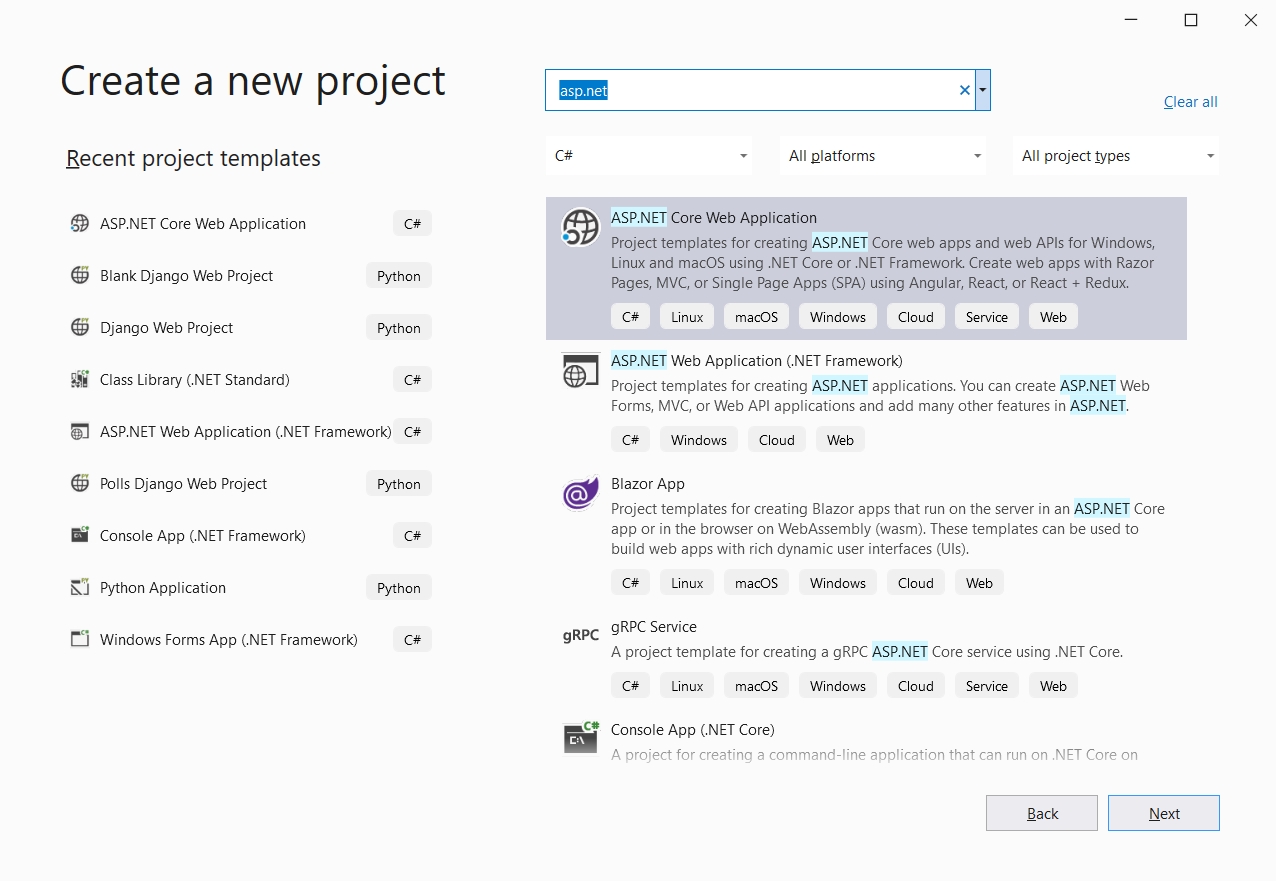
Create a new project being sure to select the ASP.NET Core Web Application template.
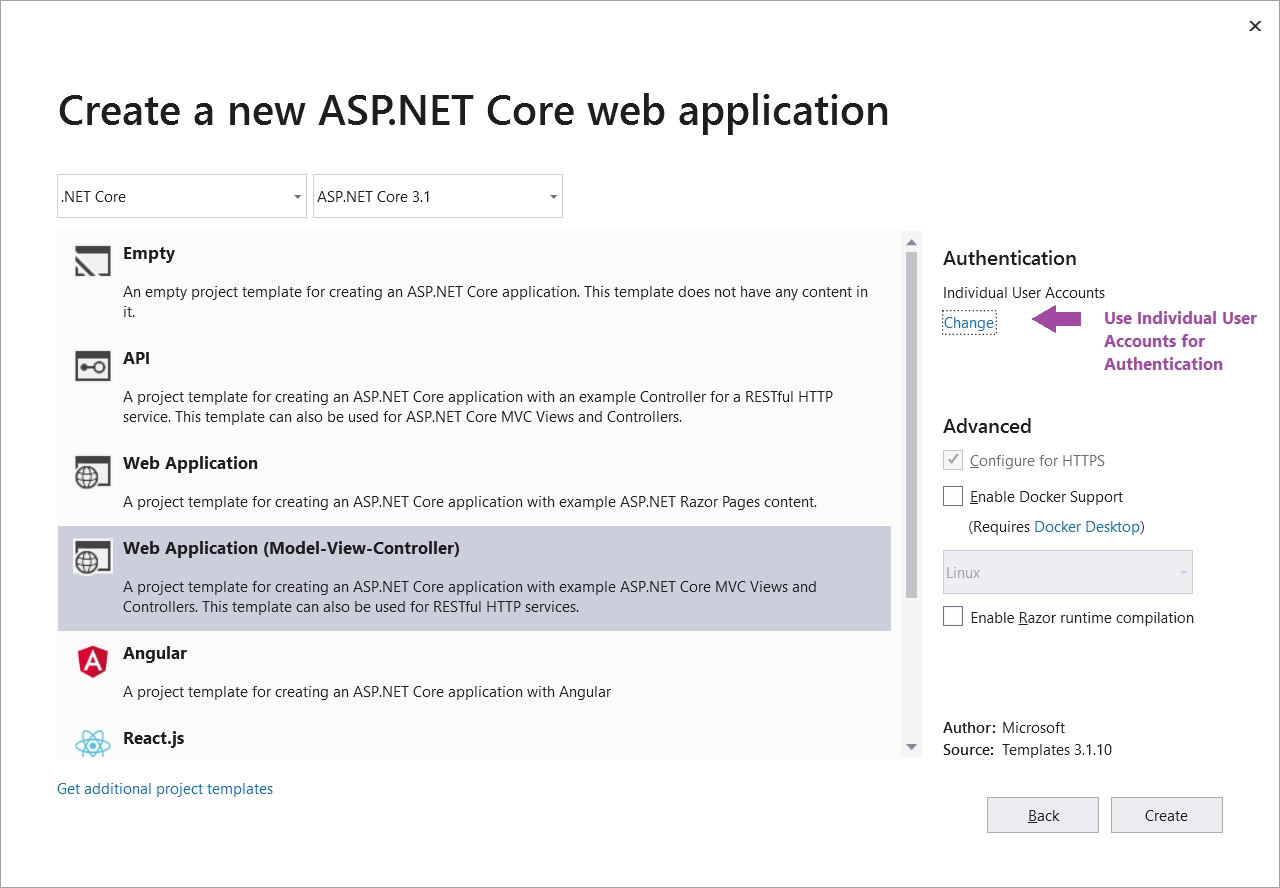
Next, select the type of ASP.NET Core web application you would like to use. I'm using the MVC (Model-View-Controller) project in this demo. Just make sure to select Authentication/IndividualUserAccounts so that we can scaffold in Identity.
After Visual Studio builds the project, go ahead and run it if you like. But first when I start these kinds of projects with Identity, I always like to change a few options so that I don't have to type in a fancy password while debugging locally. In your Startup.cs class, in the ConfigureServices(IServiceCollection services) method, expand the AddDefaultIdentity<IdentityUser>() lambda and add the following options. Obviously I have changed the password to not require digits, non-alphanumerics (symbols) or uppercase letters. The last option, SignIn.RequireConfirmedAccount would be set to true once you had a working email sender in place.
Startup.cs
...
public void ConfigureServices(IServiceCollection services)
{
services.AddDbContext<ApplicationDBContext>(options =>
options.UseSqlServer(
Configuration.GetConnectionString("DefaultConnection")));
services.AddDefaultIdentity<IdentityUser>(options =>
{
options.Password.RequireDigit = false;
options.Password.RequireNonAlphanumeric = false;
options.Password.RequireUppercase = false;
options.SignIn.RequireConfirmedAccount = false;
})
.AddEntityFrameworkStores<ApplicationDBContext>();

services.AddControllersWithViews();
services.AddRazorPages();
}
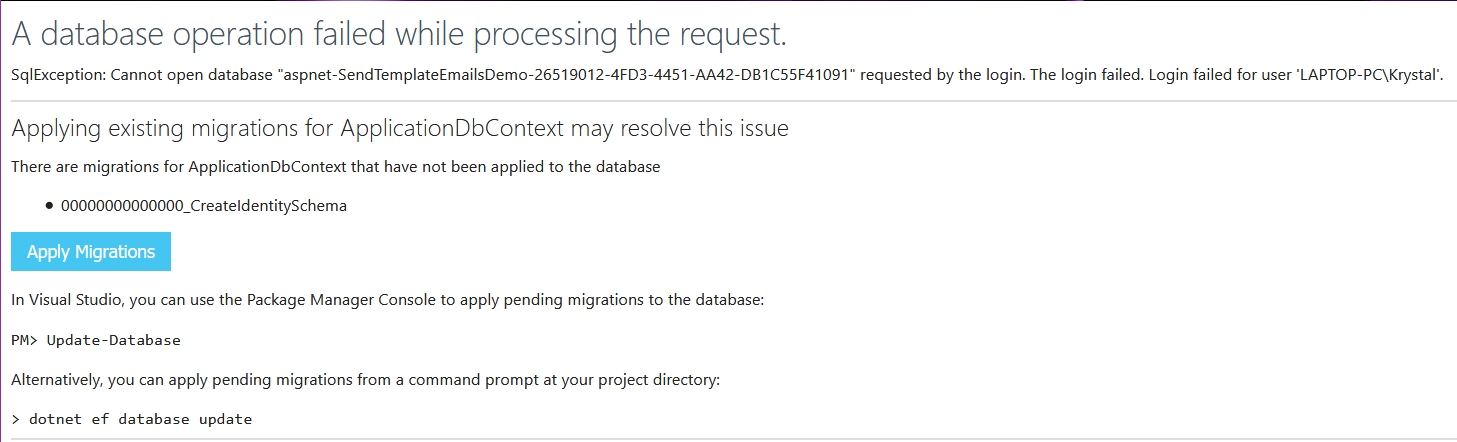
Now run the project and try to register as a new user. Whoops! There will an exception raised because migrations haven't yet been applied to the database. It is a self explanatory exception, with explicit instructions on what to do. Apply migrations and then update the database by using Visual Studio's Package Manager Console or via the Command Prompt. (I like to use Command Prompt.)
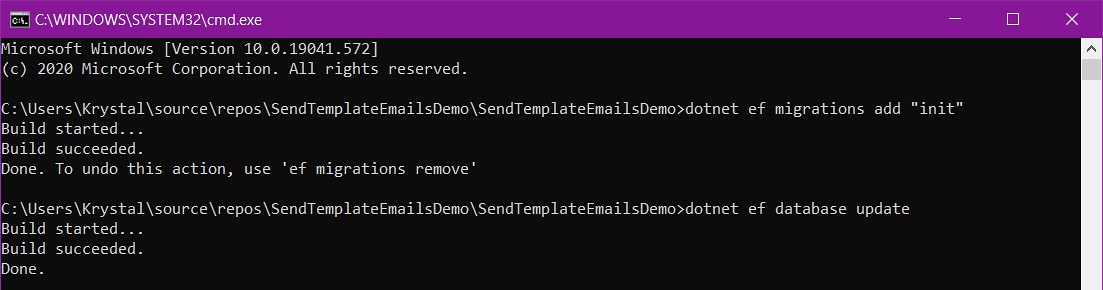
Open a Command Prompt window at the root of your project (Alt+Space if you have Open Command Line installed - one of the most useful extensions for Visual Studio in my opinion!). Use the command dotnet ef migrations add "init" to apply migrations and then dotnet ef database update to update the MS SQL local database (MSSQLLocalDB).
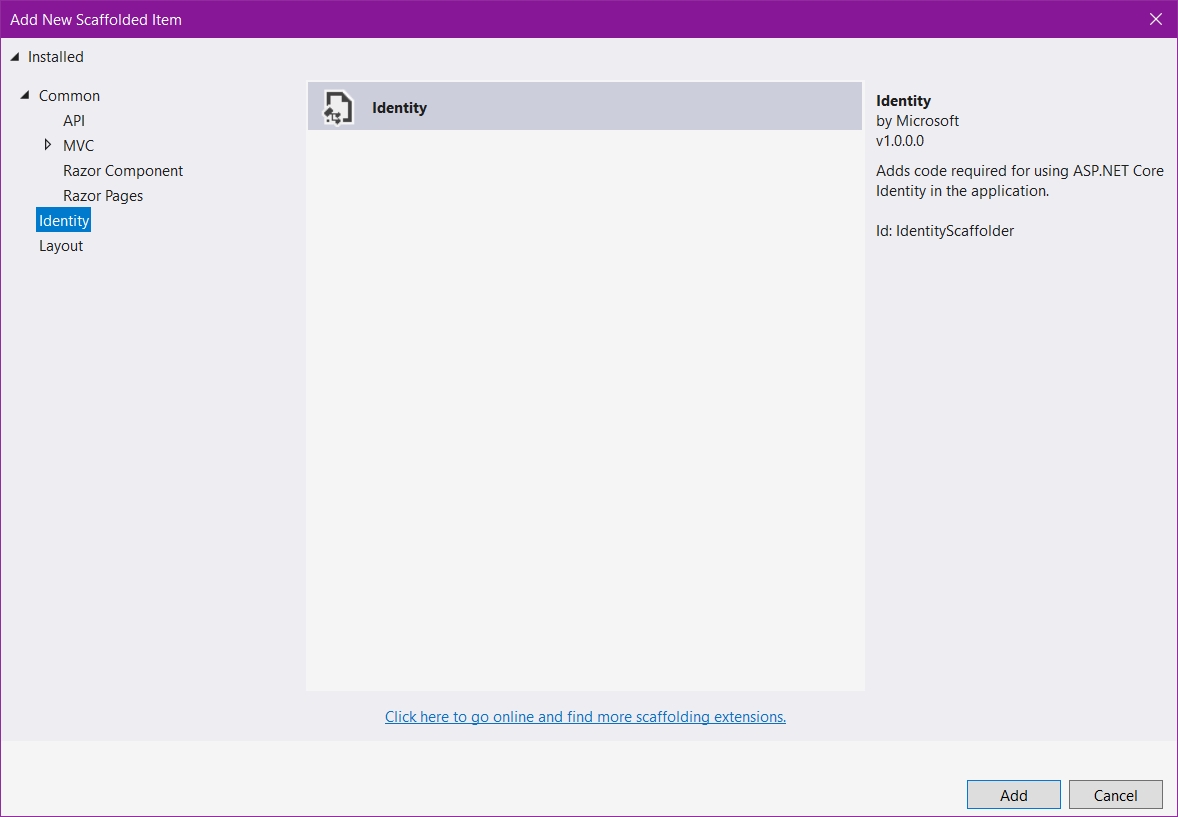
A new user can be created with no problem now we have set up the database. Now all we need to do is add in the Identity .cshtml and .cs files so we can edit the code to wire up our email sender. Right click your project (SendTemplateEmailsDemo in my case), click Add and then New Scaffolded Item..., which opens the following window. Select Identity from the vertical menu and then select the displayed item.
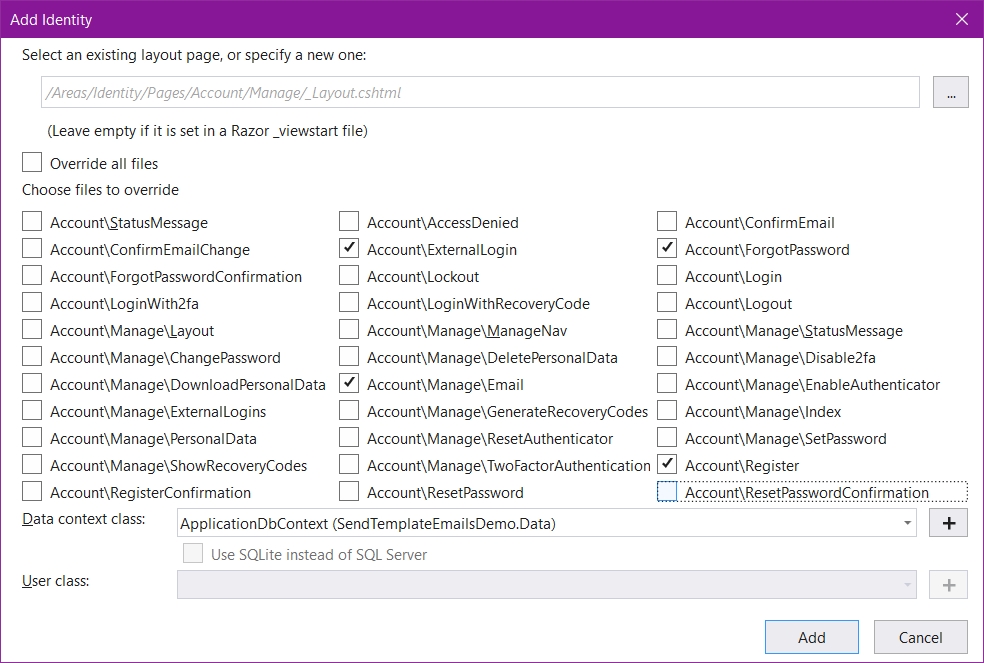
The next window displays the option to override individual identity files or all of them if you wish. For the purpose of this demo, the only files we really need are the ones which have a method that uses the email sender we want to set up. These include the classes:
- Account/ExternalLogin
- Account/Manage/Email
- Account/ForgotPassword
- Account/Register
Also don't forget to select the Data Context Class, ApplicationDBContext.cs (assuming you are using MSSQLLocalDB or SQL Server).
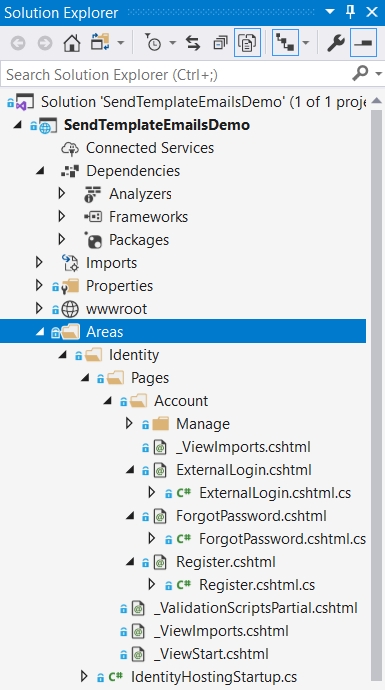
You should now find in the Areas folder of your project the scaffolded .cshtml files with their nested class .cs files.
Finally, install the Nuget package NETCore.Mailkit to the project. Right click the project Dependencies/Manage Nuget Packages... and then search and install the latest stable version of NETCore.Mailkit.

Now we are ready to start some actual coding.
Add MailKit Options to Startup.cs and Configuration Settings
Let's add the MailKit service to our ConfigureServices(IServiceCollection services) method in Startup.cs class. Don't forget the using statements using NETCore.MailKit.Extensions; and using NETCore.MailKit.Infrastructure.Internal;.
Startup.cs
...
public void ConfigureServices(IServiceCollection services)
{
services.AddDbContext<ApplicationDBContext>(options =>
options.UseSqlServer(
Configuration.GetConnectionString("DefaultConnection")));
services.AddDefaultIdentity<IdentityUser>(options =>
{
options.Password.RequireDigit = false;
options.Password.RequireNonAlphanumeric = false;
options.Password.RequireUppercase = false;
options.SignIn.RequireConfirmedAccount = false;
})
.AddEntityFrameworkStores<ApplicationDBContext>();
services.AddMailKit(config => config.UseMailKit());
services.AddControllersWithViews();
services.AddRazorPages();
}
Notice Visual Studio gives us a 'red squizzly' line under UseMailKit()? Hover over this method and the following tool tip will display.
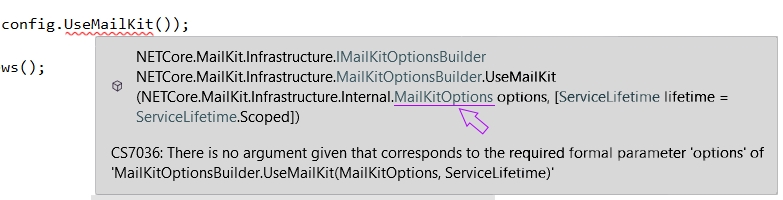
Click on MailKitOptions class to view the metadata, which will tell us what options we can use. We will be able to populate this class with our email sender settings at runtime. We will definitely use the Server, Port, SenderName and SenderEmail properties in this demo. Note that properties are also available for Account and Password, (which would be used if you are connecting to a mail server that is not your local machine) and a Security boolean (which indicates if the mail server has SSL/TLS security).
MailKitOptions [from metadata]
namespace NETCore.MailKit.Infrastructure.Internal
{
public class MailKitOptions
{
public MailKitOptions();


public string Server { get; set; }
public int Port { get; set; }
public string SenderName { get; set; }
public string SenderEmail { get; set; }
public string Account { get; set; }
public string Password { get; set; }
public bool Security { get; set; }
}
}
Now we will have to make some decisions on how we will store our email settings. In a real application, we wouldn't want to store our email settings (or other secrets) in the appsettings.json configuration file. Secrets should not be stored in plain text and most certainly should not be uploaded to Github!
An alternative solution is to store secrets using the Secrets Manager Tool when debugging locally, or using something like Microsoft's Azure Key Vault when in production. However, for the purposes of this demo, we will use appsettings.json, as setting up these tools is outside the scope of this article.
In appsettings.json, create a section "EmailSettings" and set the properties as per the MailKitOptions.cs class. Note that:
"Server": "127.0.0.1"- commonly known as 'localhost'. A real SMTP email server is most likely something"mail.(yourdomain)""Port": 25- commonly known SMTP clear text mail server port."SenderName" : "Your Name"- pretty obvious that this is the display name of the sender."SenderEmail": "Email Address"- this has to be a valid email address, it would be the email address used to send the emails.- We don't need to specify an
AccountorPasswordfor this demo, as we are using our machine as the server. Using a real email server would at minimum require you to use the username and password associated with theSenderEmail.
appsettings.json
{
"EmailSettings": {
"Server": "127.0.0.1",
"Port": 25,
"SenderName": "Krystal Ruwoldt",
"SenderEmail": "test@test.com"
},
...
}
Create in Startup.cs a variable to get these settings which we can pass into the UseMailKit() method.
Startup.cs
...
public void ConfigureServices(IServiceCollection services)
{
services.AddDbContext<ApplicationDBContext>(options =>
options.UseSqlServer(
Configuration.GetConnectionString("DefaultConnection")));
services.AddDefaultIdentity<IdentityUser>(options =>
{
options.Password.RequireDigit = false;
options.Password.RequireNonAlphanumeric = false;
options.Password.RequireUppercase = false;
options.SignIn.RequireConfirmedAccount = false;
})
.AddEntityFrameworkStores<ApplicationDBContext>();
var mailKitOptions = Configuration.GetSection("EmailSettings").Get<MailKitOptions>();
services.AddMailKit(config => config.UseMailKit(mailKitOptions));
services.AddControllersWithViews();
services.AddRazorPages();
}
The mailKitOptions variable can passed into the UseMailKit() method, therefore reducing our code to one line.
Startup.cs
...
services.AddMailKit(config => config.UseMailKit(
Configuration.GetSection("EmailSettings").Get<MailKitOptions>()));
...
Also, we will create a folder under the wwwroot to store our email templates.
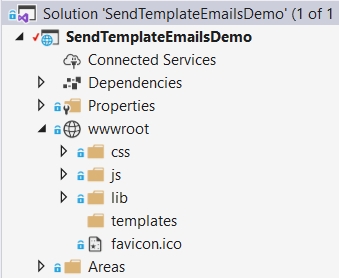
Finally let's add a path variable to appsettings.json so we can reference this path later when we create emails.
appsettings.json
...
"Path": {
"Templates": "wwwroot/templates/"
},
...
Next, let's set up Razor Pages for our Contact Form. Skip ahead for the same but using MVC. (Or try both!)
Creating a Simple Contact Form - Razor Pages
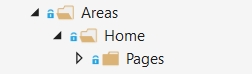
In the Areas folder where Identity is auto-scaffolded, add a new folder Home and a sub-folder Pages. We will store our contact pages in this folder.
We need to add a layout file that references our shared layout under Views/Shared/_Layout.cshtml.
I will also mention here that it is worth installing the Visual Studio Extension Add New File to quickly add new files and folders to your projects. With this extension, you simply highlight the folder you want to add a file or folder to and press Shift+F2.
So highlight the Pages folder we just created and using Shift+F2 add a new layout file _ViewStart.cshtml. We need this to reference the layout page we are using. Add the following code to this new file.
_ViewStart.cshtml
@{
Layout = "/Views/Shared/_Layout.cshtml";
}
The next file required is a view imports file so tag helpers can be imported to this Home area, as well as any using directives we need for our views. Add another new file called _ViewImports.cshtml to Areas/Home/Pages and input the following code.
_ViewImports.cshtml
@addTagHelper *, Microsoft.AspNetCore.Mvc.TagHelpers
@using SendTemplateEmailsDemo.Areas.Home
@using SendTemplateEmailsDemo.Areas.Home.Pages
Now add a partial view for the jquery validation scripts we will use on our form. Create another file under Areas/Home/Pages called _ValidationScriptsPartial.cshtml, and add these two script references.
_ValidationScriptsPartial.cshtml
<script src="~/lib/jquery-validation/dist/jquery.validate.min.js"></script>
<script src="~/lib/jquery-validation-unobtrusive/jquery.validate.unobtrusive.min.js"></script>
Next create files for our simple contact form. Create two files under Areas/Home/Pages called ContactPage.cshtml and ContactPage.cshtml.cs. Notice how the cs file nests under the cshtml file in your Solution Explorer? Also, it would be great to have a contact result page so that after a user submits the contact form they receive a response about their request. Under Areas/Home/Pages add two more files, called ContactPageResult.cshtml and ContactPageResult.cshtml.cs. Your folder structure in the Solution Explorer should now look like the following:

Beginning with the ContactPage.cshtml.cs file, change the class and constructor so that the ContactPageModel class inherits the PageModel class, and so the constructor brings in Mailkit's email service and our template path that we set up earlier. Using Authorization, we will also tag this class with [AllowAnonymous] because we will want anybody that visits our website have the ability to contact us through the form.
ContactPage.cshtml.cs
using Microsoft.AspNetCore.Authorization;
using Microsoft.AspNetCore.Mvc.RazorPages;
using NETCore.MailKit.Core;
using Microsoft.Extensions.Configuration;


namespace SendTemplateEmailsDemo.Areas.Home.Pages
{
[AllowAnonymous]
public class ContactPageModel : PageModel
{
private readonly IEmailService _emailService;
private readonly string _templatesPath;

public ContactPageModel(IEmailService emailService,
IConfiguration pathConfig)
{
_emailService = emailService;
_templatesPath = pathConfig["Path:Templates"];
}
}
}
Next we can add an Input model class within this page model that we can use to bind the contact form inputs. Add the following code within the ContactPageModel class.
ContactPage.cshtml.cs
...
using System.ComponentModel.DataAnnotations
...
public class InputModel
{
[Required]
[StringLength(50)]
public string Name { get; set; }
[Required]
[StringLength(250)]
[EmailAddress]
public string Email { get; set; }
[Required]
[StringLength(100)]
public string Subject { get; set; }
[Required]
public string Message { get; set; }
}
Finally add a property for this InputModel class with the [BindProperty] tag.
ContactPage.cshtml.cs
...
using Microsoft.AspNetCore.Mvc;
...
[BindProperty]
public InputModel Input { get; set; }
Using the input property we just created we can now flesh out our ContactPage.cshtml. We will use some simple Bootstrap css classes so our form renders better than just using boring html. Bootstrap (version 4.3.1) is already included in the template we used for our project so we might as well take advantage of it.
ContactPage.cshtml
@page
@model ContactPageModel
@{
ViewData["Title"] = "Contact";
}


<div class="container-fluid">
<div class="row text-center">
<div class="col-12">
<h2>@ViewData["Title"]</h2>
<hr />
</div>
</div>
<div class="container">
<form method="post">
<div asp-validation-summary="All" class="form-group row text-danger"></div>
<div class="form-group row">
<label class="col-sm-2 col-form-label">Name</label>
<div class="col">
<input class="form-control" asp-for="Input.Name" />
</div>
</div>
<div class="form-group row">
<label class="col-sm-2 col-form-label">Email</label>
<div class="col">
<input class="form-control" asp-for="Input.Email" />
</div>
</div>
<div class="form-group row">
<label class="col-sm-2 col-form-label">Subject</label>
<div class="col">
<input class="form-control" asp-for="Input.Subject" />
</div>
</div>
<div class="form-group row">
<label class="col-sm-2 col-form-label">Message</label>
<div class="col">
<textarea class="form-control" asp-for="Input.Message" ></textarea>
</div>
</div>
<div class="form-group row text-center">
<div class="col-12">
<input type="submit" value="Submit" class="btn btn-primary" />
</div>
</div>
</form>
</div>
</div>
@section Scripts {
<partial name="_ValidationScriptsPartial" />
}
Now let's set up our ContactPageResult.cshtml.cs file so we have a redirection page for the user once the contact form is submitted. This class is fairly simple with just a standard get method.
ContactPageResult.cshtml.cs
using Microsoft.AspNetCore.Authorization;
using Microsoft.AspNetCore.Mvc.RazorPages;


namespace SendTemplateEmailsDemo.Areas.Home.Pages
{
[AllowAnonymous]
public class ContactPageResultModel : PageModel
{
public void OnGet()
{


}
}
}
Lastly, we just need to set up the ContactPageResult.cshtml to be rendered with a very basic thankyou message.
ContactPageResult.cshtml
@page
@model ContactPageResultModel
@{
ViewData["Title"] = "Contact Result";
}


<div class="container">
<h2>@ViewData["Title"]</h2>
<p>Thankyou for your email!</p>
</div>
We can set up the same contact views in the MVC style. This will be very easy as much of the work we have already done in this section!
Creating a Simple Contact Form - MVC
We first will create a new folder in the root of our project called ViewModels, as we want to define a set of display properties for our contact form, similar to the InputModel class we created for the Razor Pages in the previous section. Then add a new file ContactMVC.cs in this folder. Notice this view model will have exactly the same properties as the input model (as we are just wiring up the same form two different ways).
ContactMVC.cs
using System.ComponentModel.DataAnnotations


namespace SendTemplateEmailsDemo.ViewModels
{
public class ContactMVC
{
[Required]
[StringLength(50)]
public string Name { get; set; }
[Required]
[StringLength(250)]
[EmailAddress]
public string Email { get; set; }
[Required]
[StringLength(100)]
public string Subject { get; set; }
[Required]
public string Message { get; set; }
}

}
This newly created ViewModels folder can be referenced in our _ViewImports.cshtml file located within the Views folder.
_ViewImports.cshtml
@using SendTemplateEmailsDemo
@using SendTemplateEmailsDemo.Models
@using SendTemplateEmailsDemo.ViewModels
@addTagHelper *, Microsoft.AspNetCore.Mvc.TagHelpers
Under the /Views/Home folder, create two cshtml files, ContactMVC.cshtml and ContactResultMVC.cshtml. We can basically copy the cshtml files we created in the previous section to quickly generate these files. Just make sure the tags specific to Razor Pages are not present in these new views, and ensure the references point to our new ContactMVC.cs view model.
ContactMVC.cshtml
@model ContactMVC
@{
ViewData["Title"] = "Contact";
}


<div class="container-fluid">
<div class="row text-center">
<div class="col-12">
<h2>@ViewData["Title"]</h2>
<hr />
</div>
</div>
<div class="container">
<form method="post">
<div asp-validation-summary="All" class="form-group row text-danger"></div>
<div class="form-group row">
<label class="col-sm-2 col-form-label">Name</label>
<div class="col">
<input class="form-control" asp-for="Name" />
</div>
</div>
<div class="form-group row">
<label class="col-sm-2 col-form-label">Email</label>
<div class="col">
<input class="form-control" asp-for="Email" />
</div>
</div>
<div class="form-group row">
<label class="col-sm-2 col-form-label">Subject</label>
<div class="col">
<input class="form-control" asp-for="Subject" />
</div>
</div>
<div class="form-group row">
<label class="col-sm-2 col-form-label">Message</label>
<div class="col">
<textarea class="form-control" asp-for="Message" ></textarea>
</div>
</div>
<div class="form-group row text-center">
<div class="col-12">
<input type="submit" value="Submit" class="btn btn-primary" />
</div>
</div>
</form>
</div>
</div>
@section Scripts {
<partial name="_ValidationScriptsPartial" />
}
And here is the ContactResultMVC.cshtml file.
ContactResultMVC.cshtml
@{
ViewData["Title"] = "Contact Result";
}


<div class="container">
<h2>@ViewData["Title"]</h2>
<p>Thankyou for your email!</p>
</div>
We can create a couple of IActionResult methods in the Home Controller to return these views. In /Controllers/HomeController.cs add the following methods.
HomeController.cs
...
public IActionResult ContactMVC()
{
return View();
}
public IActionResult ContactResultMVC()
{
return View();
}
...
Lets add a couple of links to these contact forms on the navbar, so we can run the project and have a look at our contact forms. In Views/Shared/_Layout.cshtml add these links to the navbar.
(Views/Shared)/_Layout.cshtml
...
<ul class="navbar-nav flex-grow-1">
<li class="nav-item">
<a class="nav-link text-dark" asp-area="" asp-controller="Home" asp-action="Index">Home</a>
</li>
<li class="nav-item">
<a class="nav-link text-dark" asp-area="Home" asp-page="/ContactPage">Contact Page</a>
</li>
<li class="nav-item">
<a class="nav-link text-dark" asp-area="" asp-controller="Home" asp-action="ContactMVC">Contact MVC</a>
</li>
<li class="nav-item">
<a class="nav-link text-dark" asp-area="" asp-controller="Home" asp-action="Privacy">Privacy</a>
</li>
</ul>
...
You should now be able to view both your contact forms while running the project, but of course the submit button will not do anything yet because we have not created post methods for the forms. There is one more step before we do this, and that is creating our html templates (remember the path and template folder we created earlier?) that we will use for sending actual emails.
Creating Email Templates
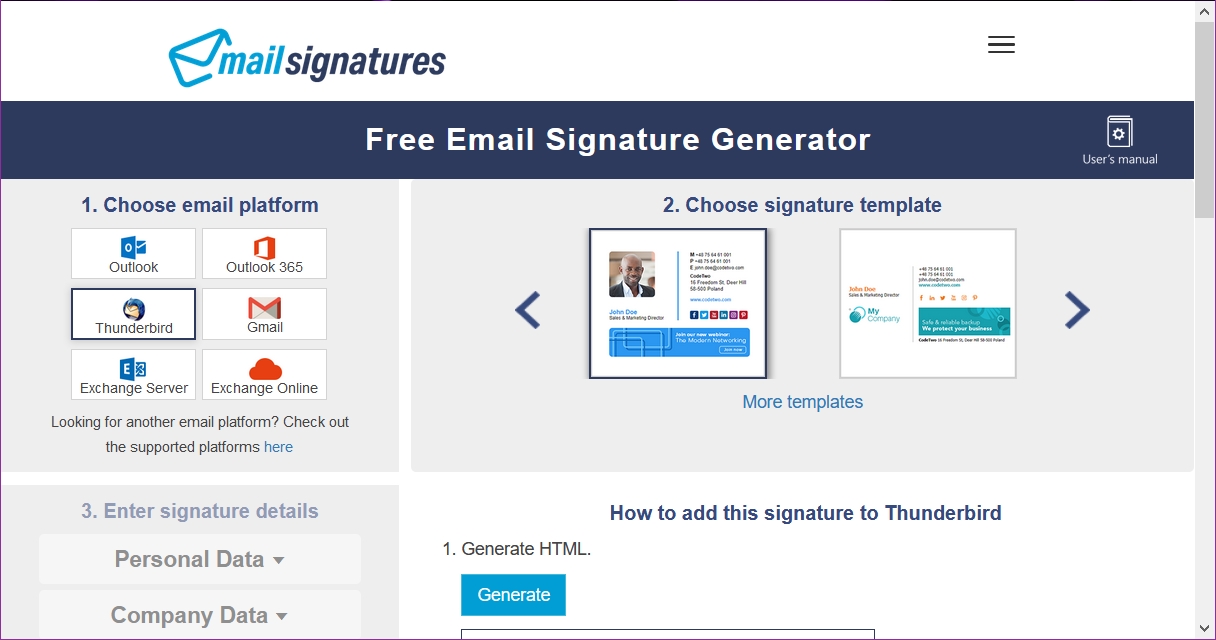
There are many free websites available that allow you to design custom signatures for emails, but we need one that can output the signature in html, so it can be stored and accessed in our project to generate the specific email we want to send. One such website I have used to generate these types of signature html files is Mail Signatures.
Take your time to design your custom signature, noting that the email platform you want to 'design' your email signature for should be Thunderbird (as Mozilla Thunderbird uses html for signatures).
Remember the Templates folder we created earlier in this tutorial? Once you have created your custom signature using the generator, save the html output in a .html file under that Templates folder. We will use this signature file as a starting point to create our custom email template. So make copies of the html file and name them ContactTemplate.html and IdentityTemplate.html.

The email template will be the 'body' of the email we end up sending through our application. So let's look at making the Identity email template first. If you look at the Post method in any of the Identity .cshtml.cs files, you will notice that the Confirmation Token for confirming the email address is already written for us, as is the generation of a callback URL. The callback URL is then inserted as part of the body parameter for AspNetCore's SendEmailAsync task.
Register.cshtml.cs - The 'body' parameter
...
public async Task<IActionResult> OnPostAsync(string returnUrl = null)
{
...
await _emailSender.SendEmailAsync(Input.Email, "Confirm your email", $"Please confirm your account by <a href='{HtmlEncoder.Default.Encode(callbackUrl)}'>clicking here</a>.");
...
}
...Mailkit's SendAsync task uses a similar 'body' parameter, which in effect will be the entirety of the IdentityTemplate.html file. So we will construct our email template by using the 'body' parameter already created for us (which is a string), along with the username of the person we are sending the email to. We will wrap these key words in square brackets (or some other wrapping method - as long as this doesn't interfere with the html/css code in the file). If this part is a bit confusing for you, check the html templates I created in this tutorial. (These are long files because of all the html and inline css created by the generator tool!)
IdentityTemplate.html
...
<body>
<p style="font-family:Tahoma, Geneva, sans-serif;
font-size:14.0px;
font-style:normal;
line-height:16px;
font-weight:normal;
color:#000000;">Hi [username],</p>
<p style="font-family:Tahoma, Geneva, sans-serif;
font-size:14.0px;
font-style:normal;
line-height:16px;
font-weight:normal;
color:#000000;">[body]</p>;
...The ContactTemplate.html uses logic similar to the above, except we are sending the email to our own mailbox and including the user's input from the form in the body of the message. I've set my contact email up as follows:
ContactTemplate.html
...
<body>
<p style="font-family:Tahoma, Geneva, sans-serif;
font-size:14.0px;
font-style:normal;
line-height:16px;
font-weight:normal;
color:#000000;">A New Contact Request:</p>
<p style="font-family:Tahoma, Geneva, sans-serif;
font-size:14.0px;
font-style:normal;
line-height:16px;
font-weight:normal;
color:#000000;">[fromName]([fromEmail]) says:</p>;
<p style="font-family:Tahoma, Geneva, sans-serif;
font-size:14.0px;
font-style:normal;
line-height:16px;
font-weight:normal;
color:#000000;">[contactMessage]</p>;
...Now we are ready to wire up our contact forms and test our work so far!
Wiring Up the Contact Form and Testing
Starting with the ContactPage.cshtml.cs, let's create a Post method that can be invoked when a user submits the form. A simple validation check can be done first that returns the page if the user fails to complete the form correctly.
ContactPage.cshtml.cs
...
public async Task<IActionResult> OnPostAsync()
{
if (!ModelState.IsValid)
return Page();
}
...
We will use the System.IO.StreamReader to read the email template and replace the key words with user input. The Stream Reader needs a full file path to access the file, so since we already created a property for the path, this is quite easy. We create strings of the 'path' and 'file name' and then join these together to make the 'full' file path.
ContactPage.cshtml.cs
...
using System.IO;
...
public async Task<IActionResult> OnPostAsync()
{
if (!ModelState.IsValid)
return Page();
string path = _templatesPath;

string template = "ContactMeTemplate.html";

string FullPath = Path.Combine(path, template);
}
...
What do you notice about this code? It's already bloated right? We are using a function Combine and creating unnecessary strings. This is great for understanding what we are trying to do but a waste of computing resources! Let's quickly refactor this.
ContactPage.cshtml.cs
...
using System.IO;
...
public async Task<IActionResult> OnPostAsync()
{
if (!ModelState.IsValid)
return Page();


string FullPath = Path.Combine(_templatesPath, "ContactMeTemplate.html");
}
...
Next, let's initialise a new Stream Reader and pass in the FullPath string we just created. The Stream Reader can now read the file, and so we will store this in a local string variable called mailText. After the Stream Reader is closed, we can replace each of the key words in that file with the Input from the Contact Form.
ContactPage.cshtml.cs
...
public async Task<IActionResult> OnPostAsync()
{
if (!ModelState.IsValid)
return Page();


string FullPath = Path.Combine(_templatesPath, "ContactTemplate.html");


StreamReader str = new StreamReader(FullPath);
string mailText = str.ReadToEnd();
str.Close();
mailText = mailText.Replace("[fromEmail]", Input.Email).Replace("[fromName]", Input.Name).Replace("[contactMessage]", Input.Message);
}
...
Finally we use Mailkit's SendAsync to construct and send the email. This task has the following parameters:
Task SendAsync(string mailTo, string subject, string message, bool isHtml = false, SenderInfo sender = null);
The parameter mailTo will be the email address we want to send the email to (ourselves in the case of a contact form), the subject we can pull from the form input and the message will be the mailText string we created. We will also need to set the default boolean isHtml to true as our message is html. We can then redirect the page to the contact result page, completing the post method.
ContactPage.cshtml.cs
...
public async Task<IActionResult> OnPostAsync()
{
if (!ModelState.IsValid)
return Page();


string FullPath = Path.Combine(_templatesPath, "ContactTemplate.html");


StreamReader str = new StreamReader(FullPath);
string mailText = str.ReadToEnd();
str.Close();
mailText = mailText.Replace("[fromEmail]", Input.Email).Replace("[fromName]", Input.Name).Replace("[contactMessage]", Input.Message);


await _emailService.SendAsync("testmailbox@test.com", Input.Subject, mailText, true);


return RedirectToPage("ContactPageResult");
}
...
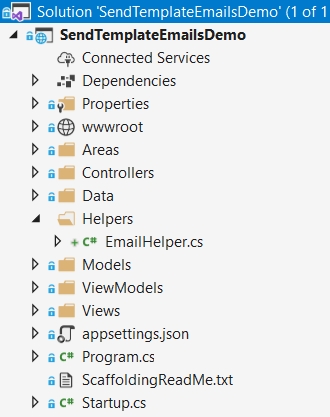
Before we move on, do you notice again that there is code here that is likely to be repeated? We are initialising a Stream Reader, giving it whatever path we have specified, getting it to read and create a string and then closing it. We are going to be doing this for whatever email we want to create. So this is a good point to think about adding some kind of helper so we don't repeat ourselves! Let's abstract this out to another folder in our project which we can call Helpers. Add a new file called EmailHelper.cs in this folder.
In this new class, let's create a static method that returns the mailText string we use to replace whatever key words we want before sending the email. Since to create the FullPath string we need to specify the Template Path that comes from our config and the template we'd like to use, this method can take those in as parameters.
EmailHelper.cs
using System.IO;


namespace SendTemplateEmailsDemo.Helpers
{
public class EmailHelper
{
public static string BuildTemplate(string path, string template)
{
string fullPath = Path.Combine(path, template);


StreamReader str = new StreamReader(fullPath);
string mailText = str.ReadToEnd();
str.Close();


return mailText;
}
}
}
Have you noticed one more refactor we can do in this BuildTemplate method? We are creating a new string for the fullPath and then passing that into the new Stream Reader. We can reduce this line of code by passing this string straight into the new Stream Reader.
EmailHelper.cs
using System.IO;


namespace SendTemplateEmailsDemo.Helpers
{
public class EmailHelper
{
public static string BuildTemplate(string path, string template)
{
StreamReader str = new StreamReader(Path.Combine(path, template));
string mailText = str.ReadToEnd();
str.Close();


return mailText;
}
}
}
Now go back to the ContactPage.cshtml.cs OnPostAsync method and use this new helper.
ContactPage.cshtml.cs
...
using SendTemplateEmailsDemo.Helpers;


public async Task<IActionResult> OnPostAsync()
{
if (!ModelState.IsValid)
return Page();


string mailText = EmailHelper.BuildTemplate(_templatesPath, "ContactTemplate.html");
mailText = mailText.Replace("[fromEmail]", Input.Email).Replace("[fromName]", Input.Name).Replace("[contactMessage]", Input.Message);


await _emailService.SendAsync("testmailbox@test.com", Input.Subject, mailText, true);


return RedirectToPage("ContactPageResult");
}
We can reuse this code in a similar manner to wire up the same form in MVC style. First the Mailkit Email Service and Template Path need to be injected into the Home Controller.
HomeController.cs
...
using Microsoft.Extensions.Configuration;
using NETCore.MailKit.Core;
...
public class HomeController : Controller
{
private readonly ILogger<HomeController> _logger;
private readonly IEmailService _emailService;
private readonly string _templatesPath;


public HomeController(ILogger<HomeController> logger,
IEmailService emailService,
IConfiguration pathConfig)
{
_logger = logger;
_emailService = emailService;
_templatesPath = pathConfig["Path:Templates"];
}
...
Next create a post method in our Home Controller for the contact form. This method will be an async Task<IActionResult> and decorated with the [HttpPost] and [ValidateAntiForgeryToken] attributes. It will also take in the view model we created earlier as a parameter. We will also set up a quick validation check and the return paths for the task.
HomeController.cs
...
using SendTemplateEmailsDemo.ViewModels;
...
[HttpPost]
[ValidateAntiForgeryToken]
public async Task<IActionResult> ContactMVC(ContactMVC vm)
{
if (!ModelState.IsValid)
return View();


return RedirectToAction("ContactResultMVC");
}
...
We are basically going to repeat the code from the ContactPage.cshtml.cs class that we used to generate the email and use the same Mailkit SendAsync task to send it. Just a few parameters need to be changed to use the view model instead of a page input model.
HomeController.cs
...
using SendTemplateEmailsDemo.Helpers;
...
[HttpPost]
[ValidateAntiForgeryToken]
public async Task<IActionResult> ContactMVC(ContactMVC vm)
{
if (!ModelState.IsValid)
return View();


string mailText = EmailHelper.BuildTemplate(_templatesPath, "ContactTemplate.html");
mailText = mailText.Replace("[fromEmail]", vm.Email).Replace("[fromName]", vm.Name).Replace("[contactMessage]", vm.Message);


await _emailService.SendAsync("testmailbox@test.com", vm.Subject, mailText, true);


return RedirectToAction("ContactResultMVC");
}
...
Let's test these post methods we have just created. If you haven't already installed PapercutSMTP, go ahead and install it to test while in debug.
Run your project and while having Papercut open, go ahead and send an email from both of the contact forms. Also try and submit the form without fields completed properly, to test the validation. When the forms have correct data you should find Papercut receives the emails you have sent through the contact forms and you are returned to the contact result pages!

Now we can wire up our Identity scaffolded pages in the next section, building on what we have just implemented above.
Wiring Up the Identity Scaffolded Pages and Testing
Remember earlier in this tutorial, how in the Startup.cs class we set the option to require a confirmed account for sign-in as false? We will change this to true so we can test the email service later.
Startup.cs
...
public void ConfigureServices(IServiceCollection services)
{
...
services.AddDefaultIdentity<IdentityUser>(options =>
{
options.Password.RequireDigit = false;
options.Password.RequireNonAlphanumeric = false;
options.Password.RequireUppercase = false;
options.SignIn.RequireConfirmedAccount = true;
})
...
}
Let's begin by wiring up the email service in the Register.cshtml.cs OnPostAsync method. Remove the using directive Microsoft.AspNetCore.Identity.UI.Services, change the constructor's IEmailSender to MailKit's IEmailService and add the template path configuration variable.
Register.cshtml.cs
...
using NETCore.MailKit.Core;
using Microsoft.Extensions.Configuration;
...
public class RegisterModel : PageModel
{
private readonly SignInManager<IdentityUser> _signInManager;
private readonly UserManager<IdentityUser> _userManager;
private readonly ILogger<RegisterModel> _logger;
private readonly IEmailService _emailService;
private readonly string _templatesPath;


public RegisterModel(
UserManager<IdentityUser> userManager,
SignInManager<IdentityUser> signInManager,
ILogger<RegisterModel> logger,
IEmailService emailService,
IConfiguration pathConfig)
{
_userManager = userManager;
_signInManager = signInManager;
_logger = logger;
_emailService = emailService;
_templatesPath = pathConfig["Path:Templates"];
}
...
We will need to do the above in each of the classes we want to send emails from. But let's finish off the Register.cshtml.cs OnPostAsync method first, as there is an error showing in the scaffolded code for the SendEmailAsync task. So, just under the code for the construction of the callback URL, add the following code to construct the email and change the _emailSender variable to use our _emailService variable instead.
Register.cshtml.cs
...
using SendTemplateEmailsDemo.Helpers;


...
public async Task<IActionResult> OnPostAsync(string returnUrl = null)
{
...
var callbackUrl = Url.Page(
"/Account/ConfirmEmail",
pageHandler: null,
values: new { area = "Identity", userId = user.Id, code = code, returnUrl = returnUrl },
protocol: Request.Scheme);


string body = $"Please confirm your account by <a href='{HtmlEncoder.Default.Encode(callbackUrl)}'>clicking here</a>.";


string mailText = EmailHelper.BuildTemplate(_templatesPath, "IdentityTemplate.html");
mailText = mailText.Replace("[username]", user.UserName).Replace("[body]", body);


await _emailService.SendAsync(Input.Email, "Confirm your email", mailText, true);


if (_userManager.Options.SignIn.RequireConfirmedAccount)
{
...
}
...
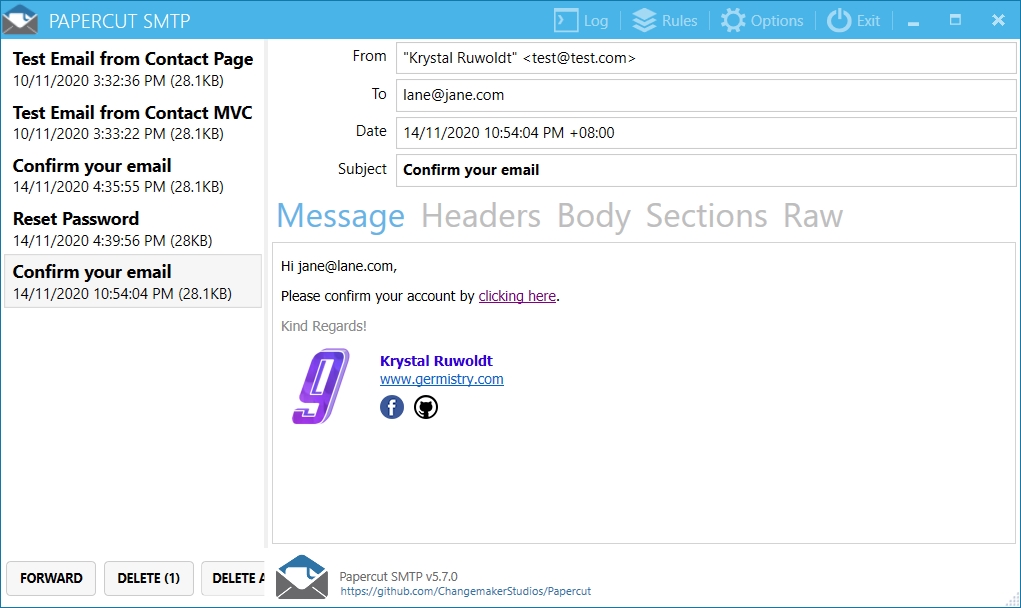
While having Papercut running, run the project and try to register a new user. You should be redirected to the following page.
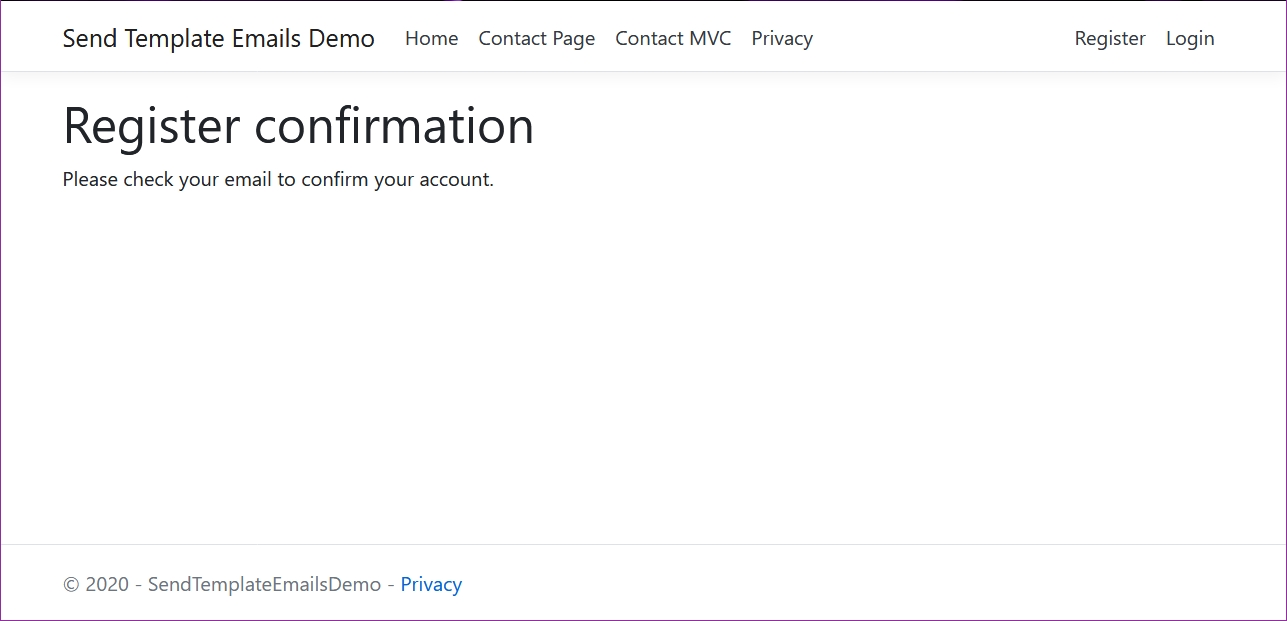
To have the Register Confirmation page display (as above) without the default code that provides the confirmation token in a link, you will need to change a boolean in the RegisterConfirmation.cshtml.cs OnGetAsync method to prevent this. (This page and its class can be scaffolded in as we did with the other Identity pages (click here to go back to that section). It is listed in the Add Identity window as /Account/RegisterConfirmation.)
RegisterConfirmation.cshtml.cs
...
DisplayConfirmAccountLink = false;
...
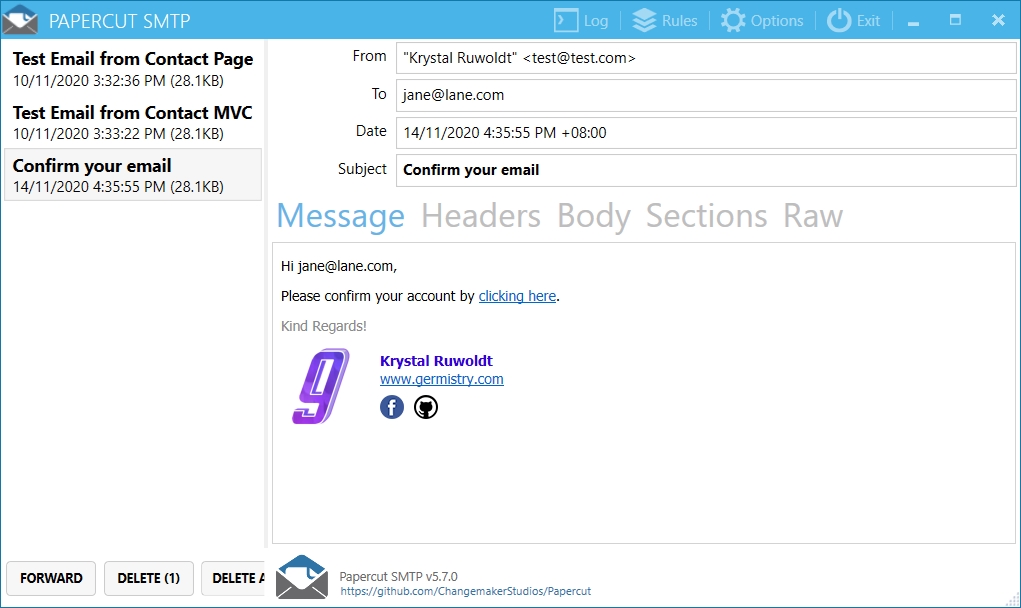
Next, check Papercut for the verification email. Check the callback URL works by clicking the link that has been generated in the email.
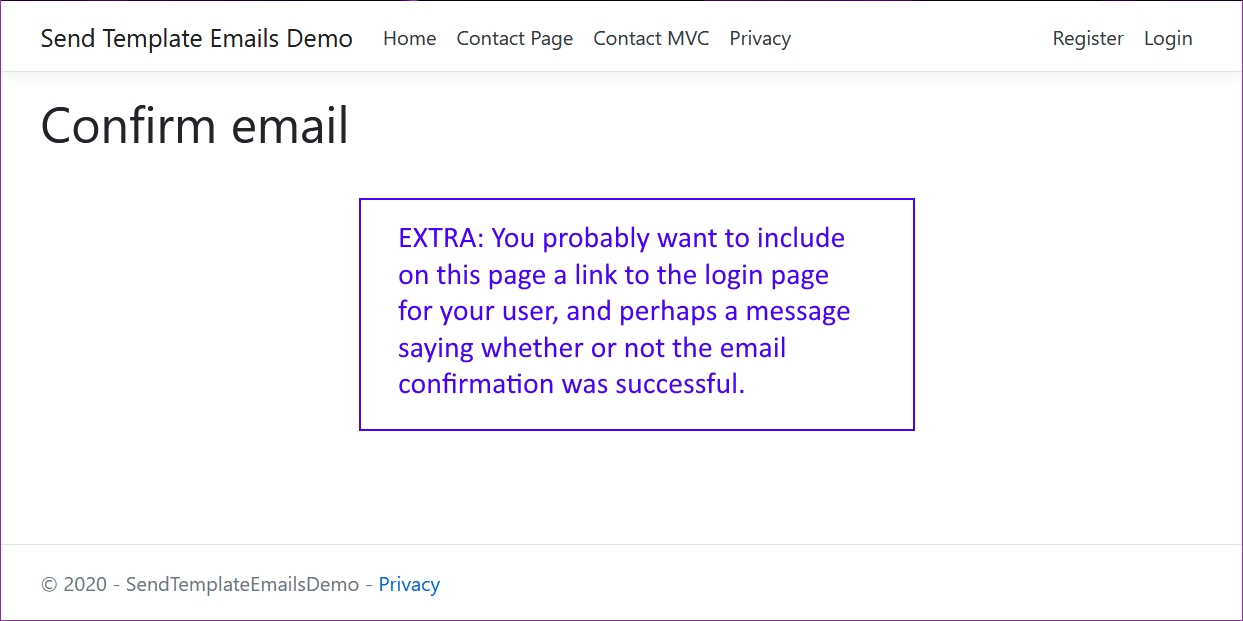
We get redirected back to the Confirm Email page which tells us our email has been successfully verified!
Now we can wire up the other pages that use the email service for verification purposes. The code for the ForgotPassword.cshtml.cs OnPostAsync method is shown below.
ForgotPassword.cshtml.cs
...
using NETCore.MailKit.Core;
using Microsoft.Extensions.Configuration;
using SendTemplateEmailsDemo.Helpers;
...
public class ForgotPasswordModel : PageModel
{
private readonly UserManager<IdentityUser> _userManager;
private readonly IEmailService _emailService;
private readonly string _templatesPath;


public ForgotPasswordModel(
UserManager<IdentityUser> userManager,
IEmailService emailService,
IConfiguration pathConfig)
{
_userManager = userManager;
_emailService = emailService;
_templatesPath = pathConfig["Path:Templates"];
}
...

public async Task<IActionResult> OnPostAsync()
{
...
var callbackUrl = Url.Page(
"/Account/ResetPassword",
pageHandler: null,
values: new { area = "Identity", userId = user.Id, code = code },
protocol: Request.Scheme);


string body = $"Please reset your password by <a href='{HtmlEncoder.Default.Encode(callbackUrl)}'>clicking here</a>.";


string mailText = EmailHelper.BuildTemplate(_templatesPath, "IdentityTemplate.html");
mailText = mailText.Replace("[username]", user.UserName).Replace("[body]", body);


await _emailService.SendAsync(Input.Email, "Reset Password", mailText, true);


return RedirectToPage("./ForgotPasswordConfirmation");
}
...
Here is the code for the ExternalLogin.cshtml.cs OnPostConfirmationAsync method. Note that you will need to have set up at least one External Login provider to actually test and use this code. Microsoft does have good documentation on this, which you can check out here.
ExternalLogin.cshtml.cs
...
using NETCore.MailKit.Core;
using Microsoft.Extensions.Configuration;
using SendTemplateEmailsDemo.Helpers;
...
public class ExternalLoginModel : PageModel
{
private readonly UserManager<IdentityUser> _userManager;
private readonly SignInManager<IdentityUser> _signInManager;
private readonly ILogger<RegisterModel> _logger;
private readonly IEmailService _emailService;
private readonly string _templatesPath;


public ExternalLoginModel(
UserManager<IdentityUser> userManager,
SignInManager<IdentityUser> signInManager,
ILogger<ExternalLoginModel> logger,
IEmailService emailService,
IConfiguration pathConfig)
{
_userManager = userManager;
_signInManager = signInManager;
_logger = logger;
_emailService = emailService;
_templatesPath = pathConfig["Path:Templates"];
}
...

public async Task<IActionResult> OnPostConfirmationAsync(string returnUrl = null)
{
...
var callbackUrl = Url.Page(
"/Account/ConfirmEmail",
pageHandler: null,
values: new { area = "Identity", userId = user.Id, code = code },
protocol: Request.Scheme);


string body = $"Please confirm your account by <a href='{HtmlEncoder.Default.Encode(callbackUrl)}'>clicking here</a>.";


string mailText = EmailHelper.BuildTemplate(_templatesPath, "IdentityTemplate.html");
mailText = mailText.Replace("[username]", user.UserName).Replace("[body]", body);


await _emailService.SendAsync(Input.Email, "Confirm your email", mailText, true);


if (_userManager.Options.SignIn.RequireConfirmedAccount)
{
...
}
...
Finally, here is the code for the Email.cshtml.cs methods. Notice that there are two methods that use the service, the first for the OnPostChangeEmailAsync method, which is called when the user changes their registered email address, and the second for the OnPostSendVerificationEmailAsync method, which is available to be called by the user if for some reason they did not verify their email address upon registering. Just be aware that the change email needs to be sent to the user's new email address!
Email.cshtml.cs
...
using NETCore.MailKit.Core;
using Microsoft.Extensions.Configuration;
using SendTemplateEmailsDemo.Helpers;
...
public class EmailModel : PageModel
{
private readonly UserManager<IdentityUser> _userManager;
private readonly SignInManager<IdentityUser> _signInManager;
private readonly IEmailService _emailService;
private readonly string _templatesPath;


public EmailModel(
UserManager<IdentityUser> userManager,
SignInManager<IdentityUser> signInManager,
IEmailService emailService,
IConfiguration pathConfig)
{
_userManager = userManager;
_signInManager = signInManager;
_emailService = emailService;
_templatesPath = pathConfig["Path:Templates"];
}
...

public async Task<IActionResult> OnPostChangeEmailAsync()
{
...
var callbackUrl = Url.Page(
"/Account/ConfirmEmailChange",
pageHandler: null,
values: new { userId = user.Id, email = Input.NewEmail, code = code },
protocol: Request.Scheme);


string body = $"Please confirm your account by <a href='{HtmlEncoder.Default.Encode(callbackUrl)}'>clicking here</a>.";


string mailText = EmailHelper.BuildTemplate(_templatesPath, "IdentityTemplate.html");
mailText = mailText.Replace("[username]", user.UserName).Replace("[body]", body);


await _emailService.SendAsync(Input.NewEmail, "Confirm your email", mailText, true);


StatusMessage = "Confirmation link to change email sent. Please check your email.";
...
}
public async Task<IActionResult> OnPostSendVerificationEmailAsync()
{
...
var callbackUrl = Url.Page(
"/Account/ConfirmEmail",
pageHandler: null,
values: new { area = "Identity", userId = user.Id, code = code },
protocol: Request.Scheme);


string body = $"Please confirm your account by <a href='{HtmlEncoder.Default.Encode(callbackUrl)}'>clicking here</a>.";


string mailText = EmailHelper.BuildTemplate(_templatesPath, "IdentityTemplate.html");
mailText = mailText.Replace("[username]", user.UserName).Replace("[body]", body);


await _emailService.SendAsync(email, "Confirm your email", mailText, true);


StatusMessage = "Verification email sent. Please check your email.";
...
}
...
You can now run your project to test out all these verification methods, as we did with registering a new user.
Well done if you got this far! If you were following along and rebuilding this demo, you should have a working email sender (on your local machine) that actually sends emails with custom templates! By changing just the Email Configuration Settings, you can implement this solution with a real email server.
Further Ideas and Improvements
Using SSL/TLS encryption on mail server
An improvement would be to use SSL/TLS encryption but this will rely on your email server having such a security certificate. From my experience, a lot of hosts provide their clients with an email server as part of their hosting plan, and often these use a 'shared certificate'. This can introduce another level of complexity to the set up of email services as a 'shared certificate' is likely going to throw validation errors when resolving the check on who holds the certificate. But if you do plan to send sensitive data by email, using SSL/TLS encryption is considered necessary.
Logging and Notifications of Website Activity
You probably also want to create logs throughout the email process for debug purposes. The controllers in MVC have the Microsoft extension 'Logging' already included in the constructor. In production, automated emails can be used to notify the web administrator of events that have occurred on the website - for example when new users sign up or when content is changed/added on the website.
Other purposes for automating email
Two other cases in which you might want to automate sending emails include:
- For marketing purposes - think newsletters, promotional emails (this is a HUGE topic and just about every website/online business does this); and
- Other security or user action notifications - for instance, a user updates preferences/other information, or commits a no-no on your site (you probably want to notify the user of their breach and subsequent banning).
Better contact or enquiry forms
An actual contact form on a website probably has more fields for the user to complete. For example, you might want to limit the subject to different cases which then determine which department receives the email. Or perhaps you want to copy (cc) that email to other mailboxes. There might also be an option for a signed-in user to upload and send attachments. Note that sending attachments doesn't seem to be supported in the current version of NETCore.Mailkit. In this case, you probably want to look into using the full Mailkit library. Using ReCaptcha on contact forms is probably something else you will also want to add - so your contact form can be used by humans only!
I hope from following this detailed tutorial you have a better understanding of how sending automated emails with templates, works in ASP.NET Core. If you have any thoughts or suggestions about this topic, share them below. Thank you for reading this post! Happy coding!